This article needs additional citations for verification. (September 2009) |

| Part of series on |
| Technical drawings |
|---|
 |
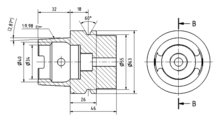
An engineering drawing is a type of technical drawing that is used to convey information about an object. A common use is to specify the geometry necessary for the construction of a component and is called a detail drawing. Usually, a number of drawings are necessary to completely specify even a simple component. These drawings are linked together by a "master drawing." This "master drawing" is more commonly known as an assembly drawing. The assembly drawing gives the drawing numbers of the subsequent detailed components, quantities required, construction materials and possibly 3D images that can be used to locate individual items. Although mostly consisting of pictographic representations, abbreviations and symbols are used for brevity and additional textual explanations may also be provided to convey the necessary information.
The process of producing engineering drawings is often referred to as technical drawing or drafting (draughting).[1] Drawings typically contain multiple views of a component, although additional scratch views may be added of details for further explanation. Only the information that is a requirement is typically specified. Key information such as dimensions is usually only specified in one place on a drawing, avoiding redundancy and the possibility of inconsistency. Suitable tolerances are given for critical dimensions to allow the component to be manufactured and function. More detailed production drawings may be produced based on the information given in an engineering drawing. Drawings have an information box or title block containing who drew the drawing, who approved it, units of dimensions, meaning of views, the title of the drawing and the drawing number.
- ^ M. Maitra, Gitin (2000). Practical Engineering Drawing. 4835/24, Ansari Road, Daryaganj, New Delhi - 110002: New Age International (P) Limited, Publishers. pp. 2–5, 183. ISBN 81-224-1176-2.
{{cite book}}: CS1 maint: location (link)